
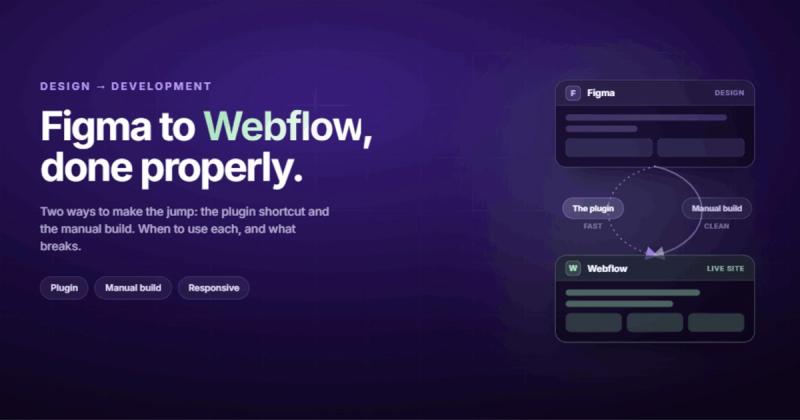
Figma to Webflow conversion turns your static design files into a live, responsive website. You can do it two ways: use the official Figma to Webflow plugin to sync auto layout frames directly, or build the site manually in Webflow using your Figma file as a visual reference. The plugin is faster for simple layouts. Manual building gives you cleaner code and more control. Most professional projects use a mix of both.
That's the short answer. Here's the longer one, from someone who's done this hundreds of times and has opinions about it.
Why Design in Figma Before Building in Webflow
I see this question come up constantly: "Why not just design directly in Webflow?" And honestly, it's a fair question. Webflow has a visual builder. You can drag elements around. Why add another tool to the process?
Because designing and building are different jobs.
Figma lets you explore ideas without worrying about whether a CSS property supports what you're doing. You can try five layout variations in twenty minutes. In Webflow, that same exploration takes two hours because you're fighting with flex properties and responsive breakpoints while you're still trying to figure out if the layout even works.
Think of it this way: you wouldn't frame a house while still deciding where the kitchen goes. Figma is where you figure out where the kitchen goes. Webflow is where you frame the house.
The other reason is collaboration. Your client, your copywriter, your brand designer, your project manager can all comment on a Figma file. Getting non-technical people to give feedback inside Webflow's designer interface is like asking them to edit a spreadsheet through the command line. It technically works, but nobody's happy.
Method 1: The Figma to Webflow Plugin
The official Figma to Webflow plugin converts auto layout frames into Webflow components. It syncs your styling, layouts, colors, text, and images. On paper, it's the fastest way to go from design to live site.
On paper.
How It Actually Works
- Install the plugin in Figma. Open your Figma file, go to Plugins, and search for "Figma to Webflow." Install it. You'll also need the Figma to Webflow app installed on your Webflow workspace.
- Authorize the connection. The plugin asks you to connect your Webflow workspace. This is a one-time setup per workspace.
- Select your frames. In Figma, select the auto layout frames you want to sync. Every layer you select needs auto layout applied. No auto layout, no sync. This is the single biggest requirement and the one that trips people up most.
- Click "Sync to Webflow." The plugin packages your selection and sends it to Webflow. Open the Figma to Webflow app in Webflow's designer, find your sync, and import the items.
- Review and adjust. Check that spacing, fonts, and colors came through correctly. They usually need tweaking. More on why in a moment.
What Transfers Well
Colors, typography styles, spacing values, and simple flex layouts transfer reliably. If your Figma file uses variables for your design tokens, those sync as Webflow variables. That part is genuinely useful for maintaining a design system across both tools.
Images from your Figma layers come through automatically. Text content syncs. Basic component structure maps to Webflow components. For a clean, simple marketing page with consistent auto layout usage, the plugin can save you a few hours of initial setup.
What Doesn't Transfer Well
Here's where the marketing copy diverges from reality.
Fonts don't come with the sync. If you're using a custom typeface in Figma, you need to upload it to Webflow before you sync. Otherwise, everything defaults to the system font and your carefully chosen typography falls apart.
Responsive behavior is a guess at best. The plugin creates responsive containers, but it doesn't know what your tablet layout should look like. Or your mobile layout. You're manually adjusting every breakpoint anyway. For a site with four breakpoints, that's where most of the build time goes, and the plugin doesn't help with any of it.
Animations don't transfer at all. Every hover state, scroll trigger, and page transition needs to be rebuilt from scratch in Webflow Interactions. If your design relies on motion (and increasingly, designs do), the plugin gives you a static skeleton and nothing else.
Deeply nested components tend to break. If your Figma file has components inside components inside components, expect the import to flatten or misinterpret the nesting. You'll spend time untangling the structure that the plugin was supposed to preserve.
I once synced a client's entire design system from Figma to Webflow using the plugin. Every variable, every component, every text style. It took 20 minutes. Then I spent the next three days fixing what it got wrong. The plugin is a starting point, not a finishing point.
Method 2: Building Manually in Webflow
The manual method is what it sounds like: you open your Figma design on one screen and Webflow on the other, and you build the site by hand using the design as a reference.
Yes, it's slower for the initial setup. No, it's not slower overall. And the code is cleaner.
The Process
- Export your assets from Figma. Images, icons, illustrations. Export them as WebP where possible (smaller files, faster loads). SVG for icons. Name your files descriptively because those filenames affect your SEO.
- Set up your Webflow project structure. Create your global styles first: typography scale, color variables, spacing system. Do this before touching a single page. If you skip this step, you'll end up with 47 classes that all do slightly different versions of the same thing.
- Build section by section. Start from the top of your design and work down. Match the Figma layout using Webflow's flexbox and grid tools. Don't try to make it pixel-identical; aim for structurally identical. The browser will render things slightly differently than Figma does, and that's fine.
- Handle responsive breakpoints as you go. Don't build the entire desktop layout first and then "make it responsive" as an afterthought. Build each section responsive from the start. Check tablet and mobile after every major component.
- Add interactions and animations. Now that your structure is solid, add your hover states, scroll animations, and transitions directly in Webflow. This is where Webflow shines and where the plugin can't help you anyway.
- Test across browsers. Chrome, Firefox, Safari, and whatever mobile browser your audience actually uses. Figma doesn't tell you about browser quirks. Only testing does.
Why Manual Often Wins
When you build manually, you control the class structure from the start. You decide what's a component, what's a utility class, what's a combo class. The result is a Webflow project that's maintainable six months from now, not just functional today.
The plugin generates class names based on your Figma layer names. Unless your Figma file is immaculately organized (and let's be honest about how often that happens), you end up with classes like "Frame 847" and "Group 23" scattered through your project. Cleaning those up takes almost as long as building from scratch.
When to Use the Plugin vs. Build Manually
This is the part most guides skip, because they're either written by Webflow (who wants you to use the plugin) or by agencies (who want you to hire them for manual builds). I'll just tell you what I've seen work.
Use the plugin when:
- You're syncing a design system (variables, color tokens, text styles) rather than full pages
- Your Figma file uses auto layout everywhere and is well-organized
- The project is a simple marketing page with minimal interactions
- You need a quick prototype to show a client, not a production build
Build manually when:
- The site has complex interactions, animations, or scroll-based effects
- Your Figma file wasn't built with Webflow in mind (no auto layout, messy layers)
- You need clean, maintainable class structures for long-term use
- The project has multiple responsive breakpoints with custom layouts per device
- You're building a CMS-driven site where template structure matters
Most real projects fall into the second category. The plugin is useful for getting design tokens into Webflow quickly, but the actual page building almost always ends up being manual.
How to Structure Your Figma File for Webflow (Before You Design)
This is where most teams waste the most time, and almost nobody talks about it. The Figma-to-Webflow workflow doesn't start when you install the plugin. It starts when you set up your Figma file.
If you structure your Figma file with Webflow in mind from day one, the conversion (plugin or manual) becomes dramatically easier. Here's what that looks like:
Use auto layout on everything. Not just the frames you plan to sync. Everything. Auto layout in Figma maps directly to flexbox in Webflow. If you're using absolute positioning or manual spacing in Figma, you're creating layouts that don't translate to the web without rework.
Name your layers like CSS classes. Instead of "Frame 12" or "hero-section-v3-final-FINAL," use names like "hero-container," "nav-link," "card-grid." When these names sync to Webflow (or when you're referencing them during manual builds), they should make sense as class names.
Design at 1440px or 1920px for desktop. Then create separate frames for tablet (768px) and mobile (375px). Don't try to make one Figma frame "responsive." Figma doesn't do responsive design. It does multiple static layouts at different widths. Webflow handles the actual responsive behavior.
Use Figma variables for your design tokens. Colors, spacing values, font sizes. When you sync these to Webflow, they become Webflow variables. This is the single most time-saving thing you can do.
Keep nesting shallow. Two or three levels deep, max. Every nested component in Figma becomes a nested div in Webflow. Deep nesting creates div soup that's hard to maintain and bad for performance.
Common Problems (and What Actually Fixes Them)
| Problem | Why It Happens | The Fix |
|---|---|---|
| Fonts look different in Webflow | Custom fonts aren't uploaded to Webflow before sync | Upload all custom fonts to Webflow first, then sync |
| Layout shifts on different screen sizes | Plugin doesn't define breakpoint behavior | Manually adjust layouts at each Webflow breakpoint |
| Messy class names everywhere | Figma layer names weren't cleaned up | Rename layers in Figma before syncing, or rename classes in Webflow after |
| Images look blurry | Wrong export settings or compression | Export at 2x from Figma, use WebP format, keep under 200KB |
| Plugin times out on large syncs | Too many layers selected at once | Sync section by section instead of the full page |
| Animations missing | Interactions don't transfer between tools | Build all animations directly in Webflow Interactions |
The "Pixel Perfect" Myth
I need to say something that might be unpopular with designers: pixel-perfect conversion from Figma to Webflow is a waste of time.
Figma is a design tool. It renders text, spacing, and elements using its own rendering engine. Browsers use a completely different one. A 16px font in Figma and a 16px font in Chrome will render slightly differently. Line heights behave differently. Sub-pixel rendering varies between browsers and operating systems.
Chasing pixel perfection means spending hours nudging margins by 1-2 pixels to match a Figma mockup that your users will never see. They'll see the website. On their screen. With their browser. At their zoom level.
What matters is structural accuracy. The hierarchy is right. The spacing proportions feel right. The typography scale works. The responsive behavior makes sense. That's what users experience. Not whether a button is 12px or 14px from the edge of a card.
When we handle Figma to Webflow development for clients, we aim for structural fidelity, not pixel fidelity. The result looks like the design. It just doesn't overlay perfectly at 1:1 zoom in a comparison tool. And that's fine, because comparison tools aren't your users.
Webflow-Specific Tips That Save Hours
Set up a global class system before you start building. Create base classes for headings (h1-style, h2-style), body text, buttons, and containers. Apply these first, then use combo classes for variations. This prevents the "200 unique classes" problem that makes Webflow projects unmaintainable.
Use Webflow's built-in responsive system, not custom breakpoints. Webflow gives you four breakpoints: desktop (base), tablet (991px), mobile landscape (767px), and mobile portrait (478px). Work within these. Custom breakpoints add complexity without proportional benefit for most sites.
Build components in Webflow, not just pages. If a card layout appears in three places, build it as a Webflow component once. The Figma plugin doesn't always map Figma components to Webflow components correctly, so verify this manually.
Test your CMS bindings early. If the site uses Webflow CMS (and most marketing sites should), connect your CMS fields to the design early in the build. Don't wait until the static version is "done." CMS content behaves differently from static content, especially with text length and image aspect ratios.
If you're coming from a different platform, our migration service handles the transition end to end, including the Figma-to-Webflow build.
Should You Do This Yourself or Hire a Webflow Developer?
Honest answer: it depends on what you're building.
A simple landing page with a few sections, no CMS, and no custom interactions? You can handle that yourself with the plugin and some patience. Budget a weekend for it.
A marketing site with 10+ pages, CMS collections, custom animations, and responsive layouts for every breakpoint? Hire someone. Not because it's impossible to learn, but because the learning curve costs you time, and the mistakes cost you performance and maintainability.
The Figma-to-Webflow workflow has a deceptive learning curve. The first 80% feels easy. The last 20% (responsive edge cases, CMS template logic, interaction timing, performance optimization) is where experience matters. That last 20% is also what separates a site that works from a site that feels fast and converts.
Frequently Asked Questions
Can you convert any Figma design to Webflow?
Technically, yes. Practically, it depends on how the Figma file is structured. Designs using auto layout with clean layer naming convert smoothly. Designs with absolute positioning, messy nesting, and unnamed layers require significant rework during conversion. The design itself isn't the limitation; the structure is.
Is the Figma to Webflow plugin free?
The plugin is free to install and use. You need a Webflow workspace (paid) and a Figma account. There are no additional per-sync charges. Third-party alternatives like Magicul charge for their conversion services, but the official plugin from Webflow is free.
How long does it take to convert a Figma design to Webflow?
A simple landing page takes 4-8 hours for an experienced developer. A full marketing site with 10+ pages, CMS, and custom interactions takes 2-4 weeks. The plugin doesn't change these timelines dramatically because responsive work and interactions still need manual building.
Do Figma animations transfer to Webflow?
No. Figma prototyping animations (smart animate, transitions between frames) don't transfer to Webflow. All animations need to be rebuilt using Webflow Interactions. This includes hover states, scroll triggers, page load animations, and any motion design.
Does the plugin work in Safari?
No. The Figma to Webflow plugin isn't supported in Safari. Use Chrome or the Figma desktop app instead. This is a known limitation that Webflow hasn't resolved.
What happens to my Figma components in Webflow?
Figma components sync as Webflow components, but the mapping isn't always clean. Simple components transfer well. Components with variants, complex overrides, or deep nesting often need to be restructured in Webflow. Verify your component structure after every sync.
Comments